

You know most of the ins and outs of Excel. You’re using it to create reports and automate things for yourself or your work. But there is still one thing that you haven’t been able to get into: Visual Basic.
Welcome to the advanced lesson on Excel. We’ll be introducing you to the world of VBA.
By design, the lesson is quite short. So expect it to take about five minutes. Let’s get started.
VBA Macros intro
Using formulas we can do some nifty things. We can make Excel look up values in a table, we can get the current date and we have looked at logic functions. This allow us to automate certain tasks and become more productive. But there is still a feature that will blow all of our formulas so far out of the water. That feature is called Visual Basic for Applications (VBA). This lesson will be a teaser of the world of VBA to introduce you to it and to make sure you know what it is broadly speaking.
What is VBA?
Visual Basic for Applications is a programming language that is often referred to as just Visual Basic or VBA. It is used in Excel, but also in other Office applications like Word and Access and even non-Office programs like AutoCAD.
Why learn Visual Basic?
Many programming languages are similar to each other in their syntax and way of thinking. The same goes for Visual Basic. If you become proficient at Visual Basic, you will have a skill that will be in demand for many years to come: programming.
Even if VBA is no longer used, another programming language is. And you will have the knowledge to pick this new language up very quickly.
Getting started with VBA
You can start thinking of yourself as a developer now because we are going to enable the Developer tab on the Ribbon.
Right click anywhere on the Ribbon and click on Customize the Ribbon….
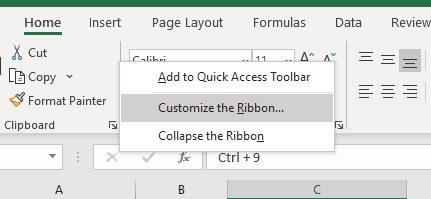
The Excel Options window will open on the Customize Ribbon tab.
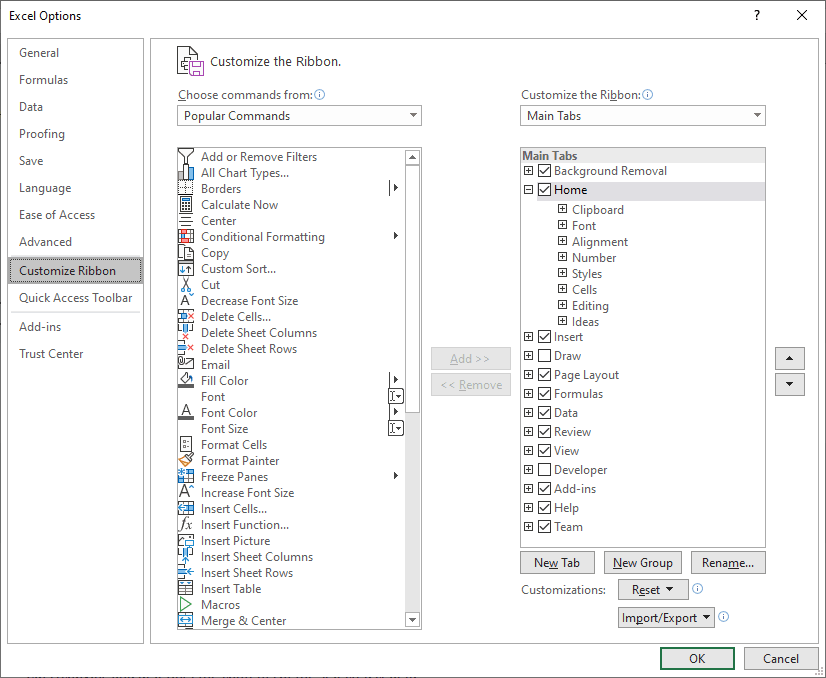
Check the box next to Developer to enable the Developer tab on the Ribbon. Click OK.
Time to make a button
Go to the newly enabled Developer tab on the Ribbon. Click on Insert in the Controls command group.
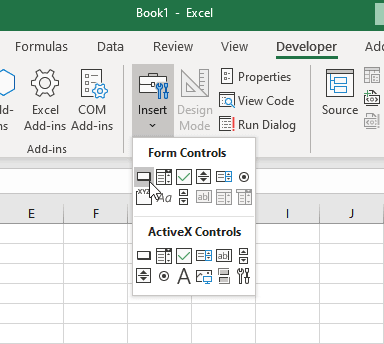
In the dropdown that opens, you can see a couple of form elements, called Controls. They are (confusingly) divided up into Form Controls and ActiveX Controls. For now, you can think of Form Controls as the normal version and ActiveX Controls as the advanced versions of form elements.
Hovering with your mouse over the options in the dropdown will show their names.
Click on the Button Form Control. This is the first element (the rectangle all the way at the top left of the dropdown, below the word Form). As soon as you hover over the cells in the worksheet, your cursor will change into a cross icon. This is to signal that you can draw a button.
Click and drag the mouse to create a button on your sheet. The Assign Macro window opens as soon as you release the mouse button.
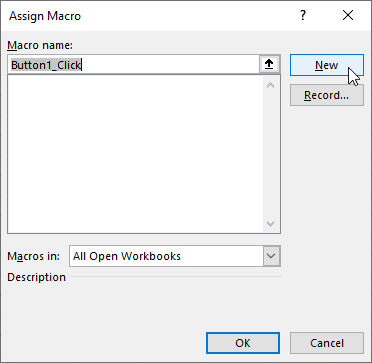
This window allows us to add code to run when we click on the button. The window layout is not very intuitive. Luckily, there are only a few window elements important to us right now:
Macro name is the name of the code routine which will run when it’s triggered. In this case, the trigger is clicking the button. The macro name doesn’t matter much so leave it be for now.
The New button creates the Macro (the code routine) structure and connects it to the button click trigger. It also opens the VBA editor to write the code routine.
Writing some VBA
Click on the New button. The VBA editor opens, showing a window with the following text:
Sub Button1_Click()

End Sub
Or similar.
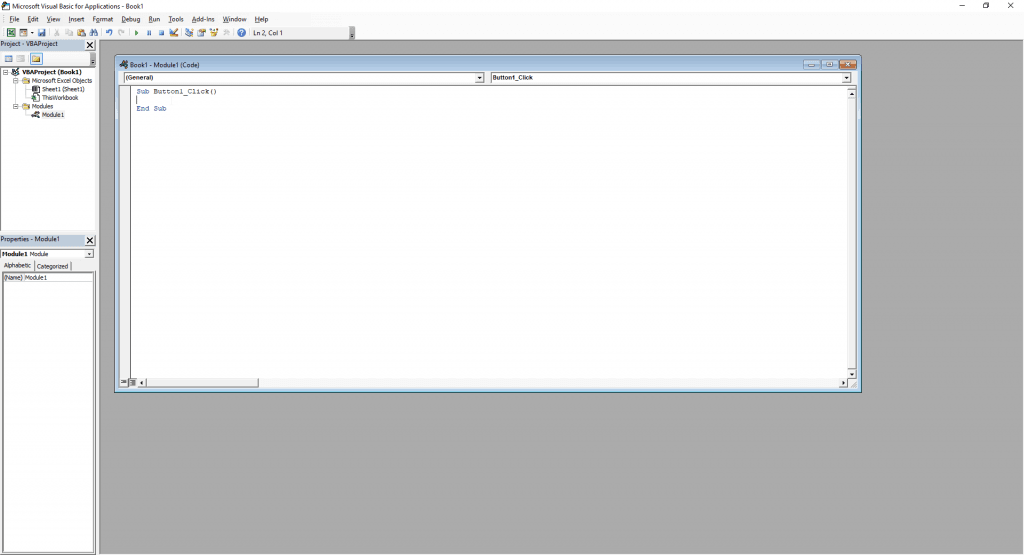
This piece of code is the structure of the macro that we’ve been talking about.
On the empty line, between the two lines of text is where you can write the code that is executed when the button is clicked. For this lesson, we’ll write:
Sub Button1_Click()
Range("A1").Value = "Test."
End Sub
You can probably imagine what this piece of code will do. It will change the value of cell A1 to be Test..
To see our code in action, we don’t have to save. All we have to do is switch back to Excel (the Excel window and the VBA editor can be open at the same time) and click on the button.
And there you go, your first VBA code was just executed!
Now you can try and replace the values in the code with your own: “A1” can be “G25” and “Test.” can be “Programmer is in the building”. Experiment and test to see what VBA can do.
Reopening the VBA editor
If you ever close the Visual Basic editor and need to get back to it, you can right click on the button and select View Code. This will open the VBA editor at the code of the button click macro.
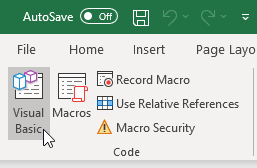
If you don’t have a button around, you can still open it by clicking on the Visual Basic button on the Ribbon. It’s in the Code command group on the Developer tab.
Concluding the VBA teaser
We have only been scratching the surface of what VBA can do. But we do hope that we might have peaked your interest a little bit. If we did, we encourage you to start learning more about VBA with a small goal in mind. Something like:
- I want to change cell A1’s value to cell A2’s value using VBA.
- I want to select cell B3 using VBA.
- I want to use an if/else statement to change A1’s value based on A2’s value using VBA.
And just try out different things to achieve them. Also, search the internet as much as you want, it is what programmers do.
Good luck!
P.S: We may create a complete VBA course if we notice that people are interested in such a thing. Send us a message through the contact page if you would be interested.
That’s it for the advanced lesson
Pretty short for a lesson on VBA huh?
We’ve done our best to condense as much information in as little space as possible. Still, we’re impressed you’ve read this far. You’ve gotten a nice start to building your VBA knowledge.
Here’s a little secret: this lesson has been taken directly from the Excel Foundation Course. If you like the way they were structured you might enjoy the full course. Although we must warn you, this is a beginner to intermediate course. Based on your skill level, this may be too easy for you.
As you could read in the lesson, we may start work on a VBA course in the future, if there is interest. Let us know if you would like us to make it by sending a message through our contact form.
If you enjoyed the lesson, please share it with people that could benefit from it.